
License
Copyright © 2020 Keith Packard
This document is released under the terms of the GNU General Public License, Version 3 or later
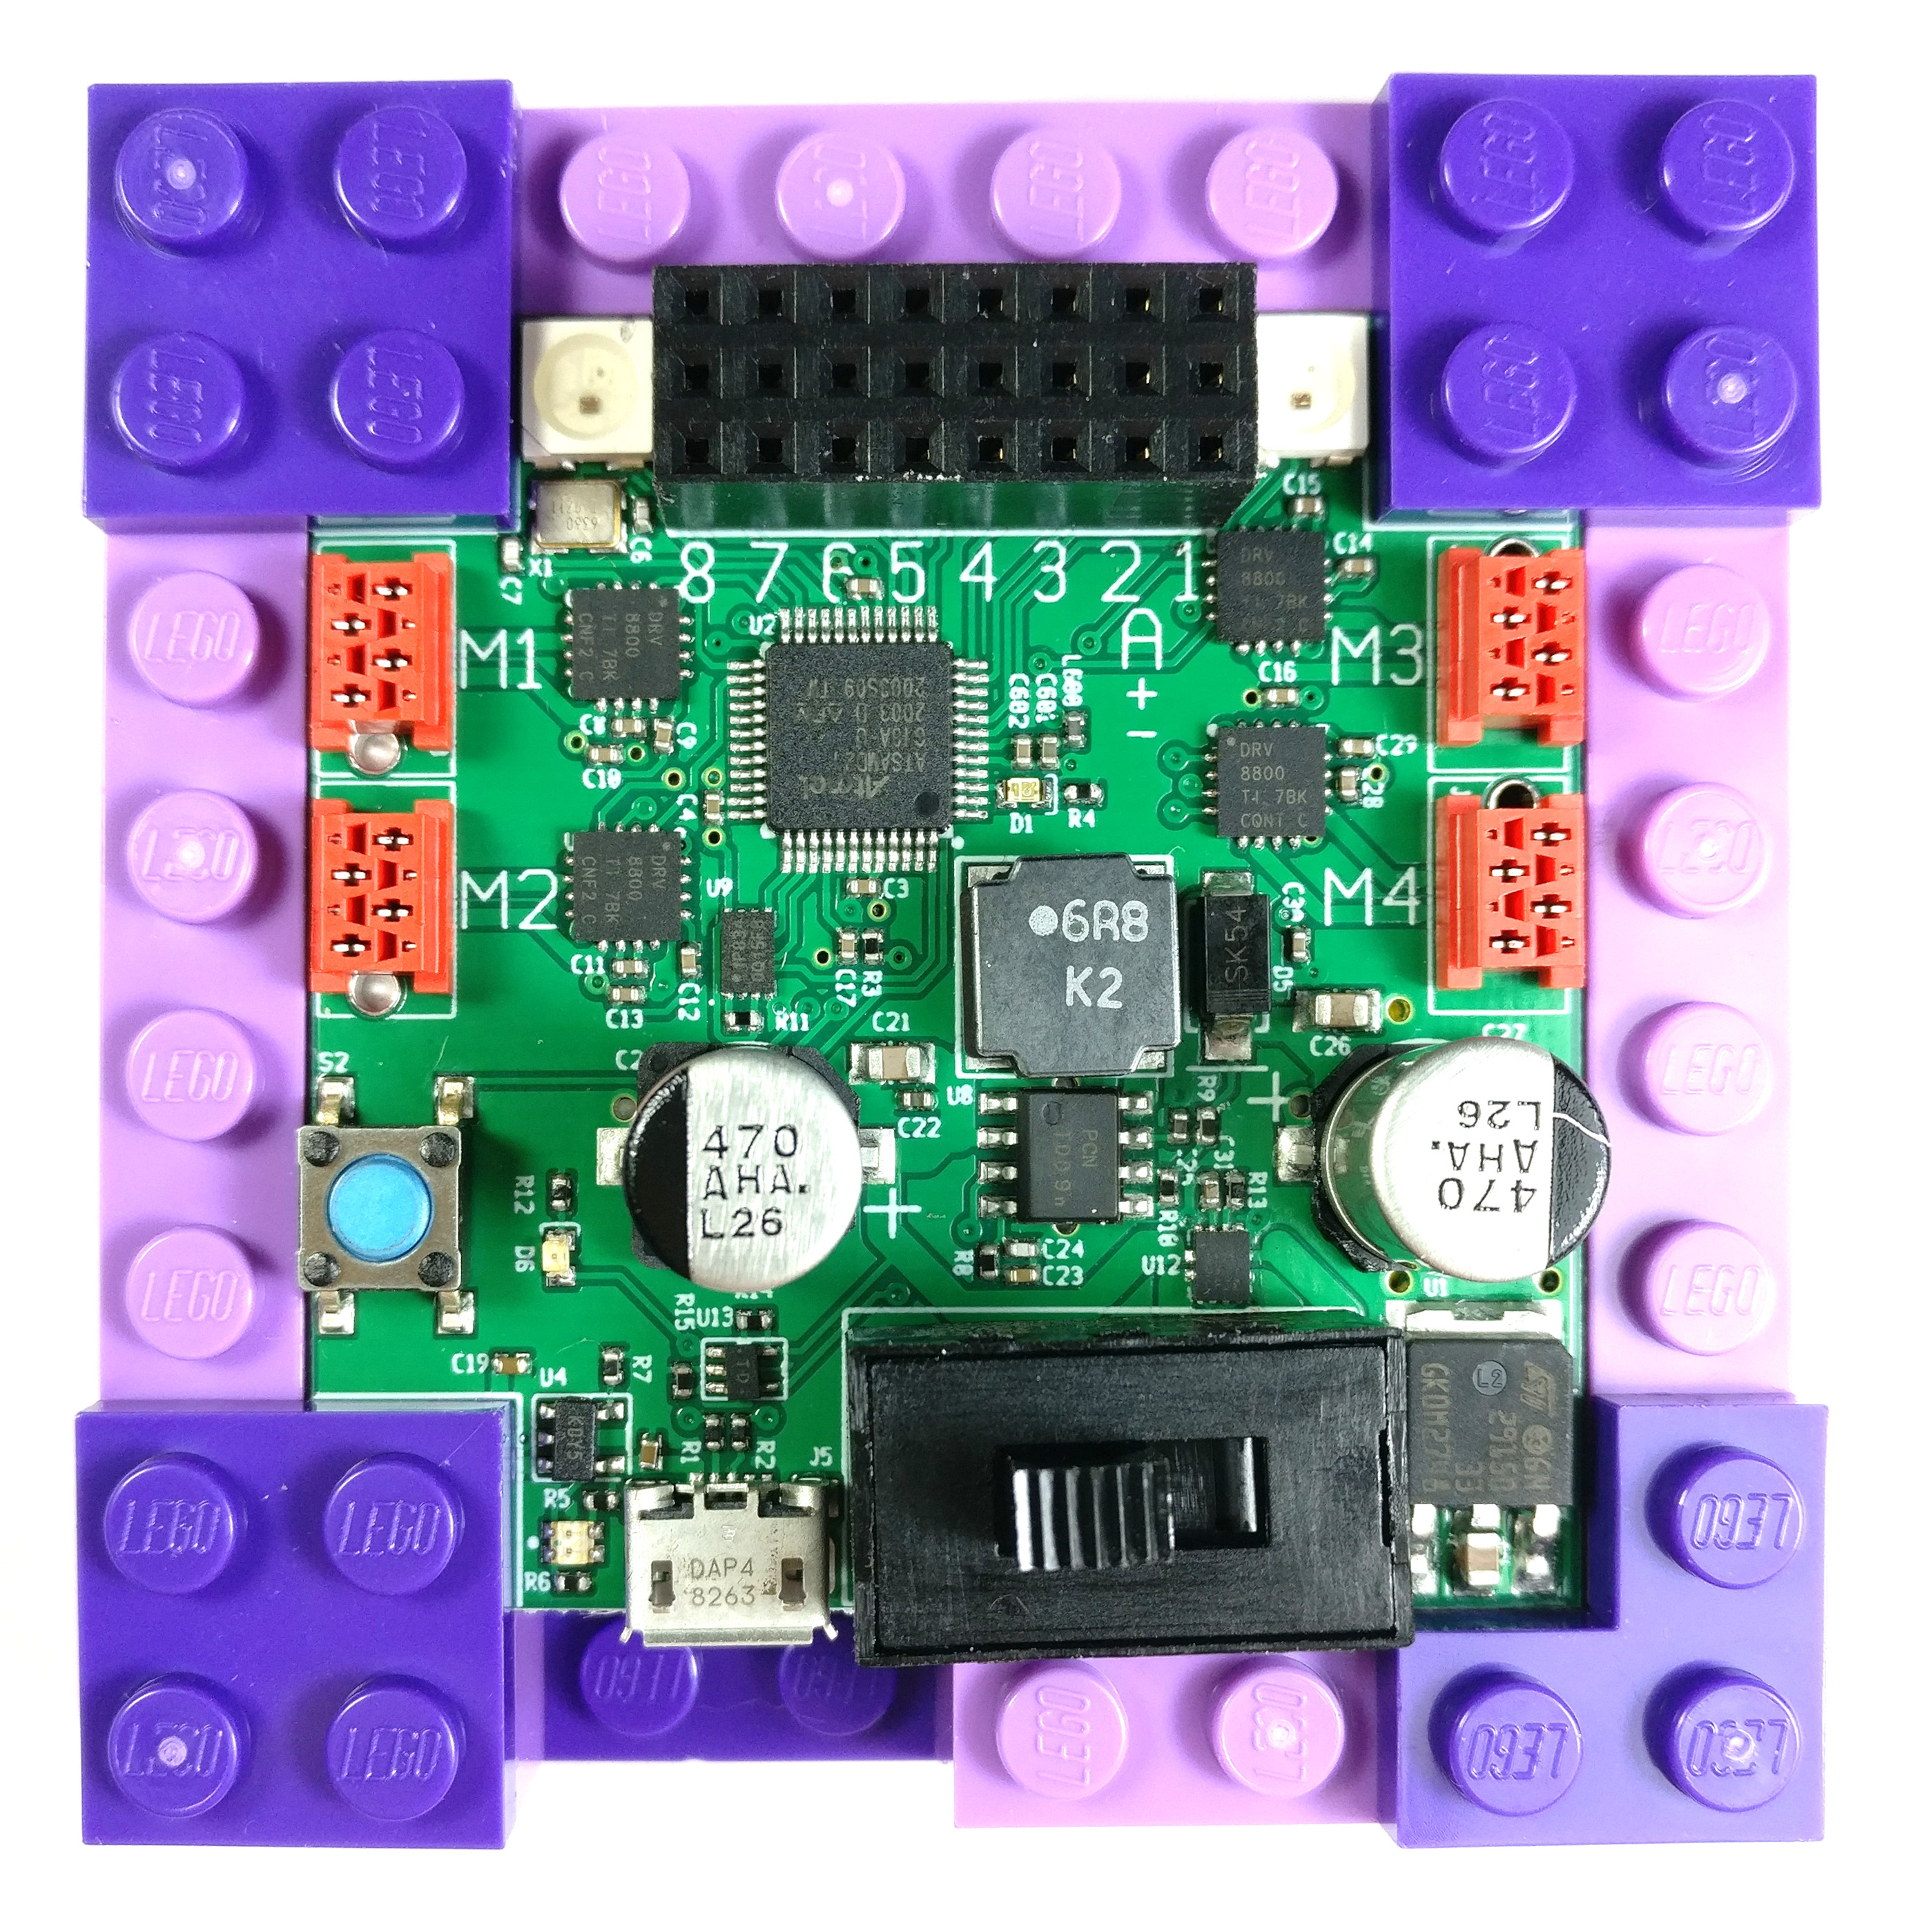
1. Introducing Snekboard
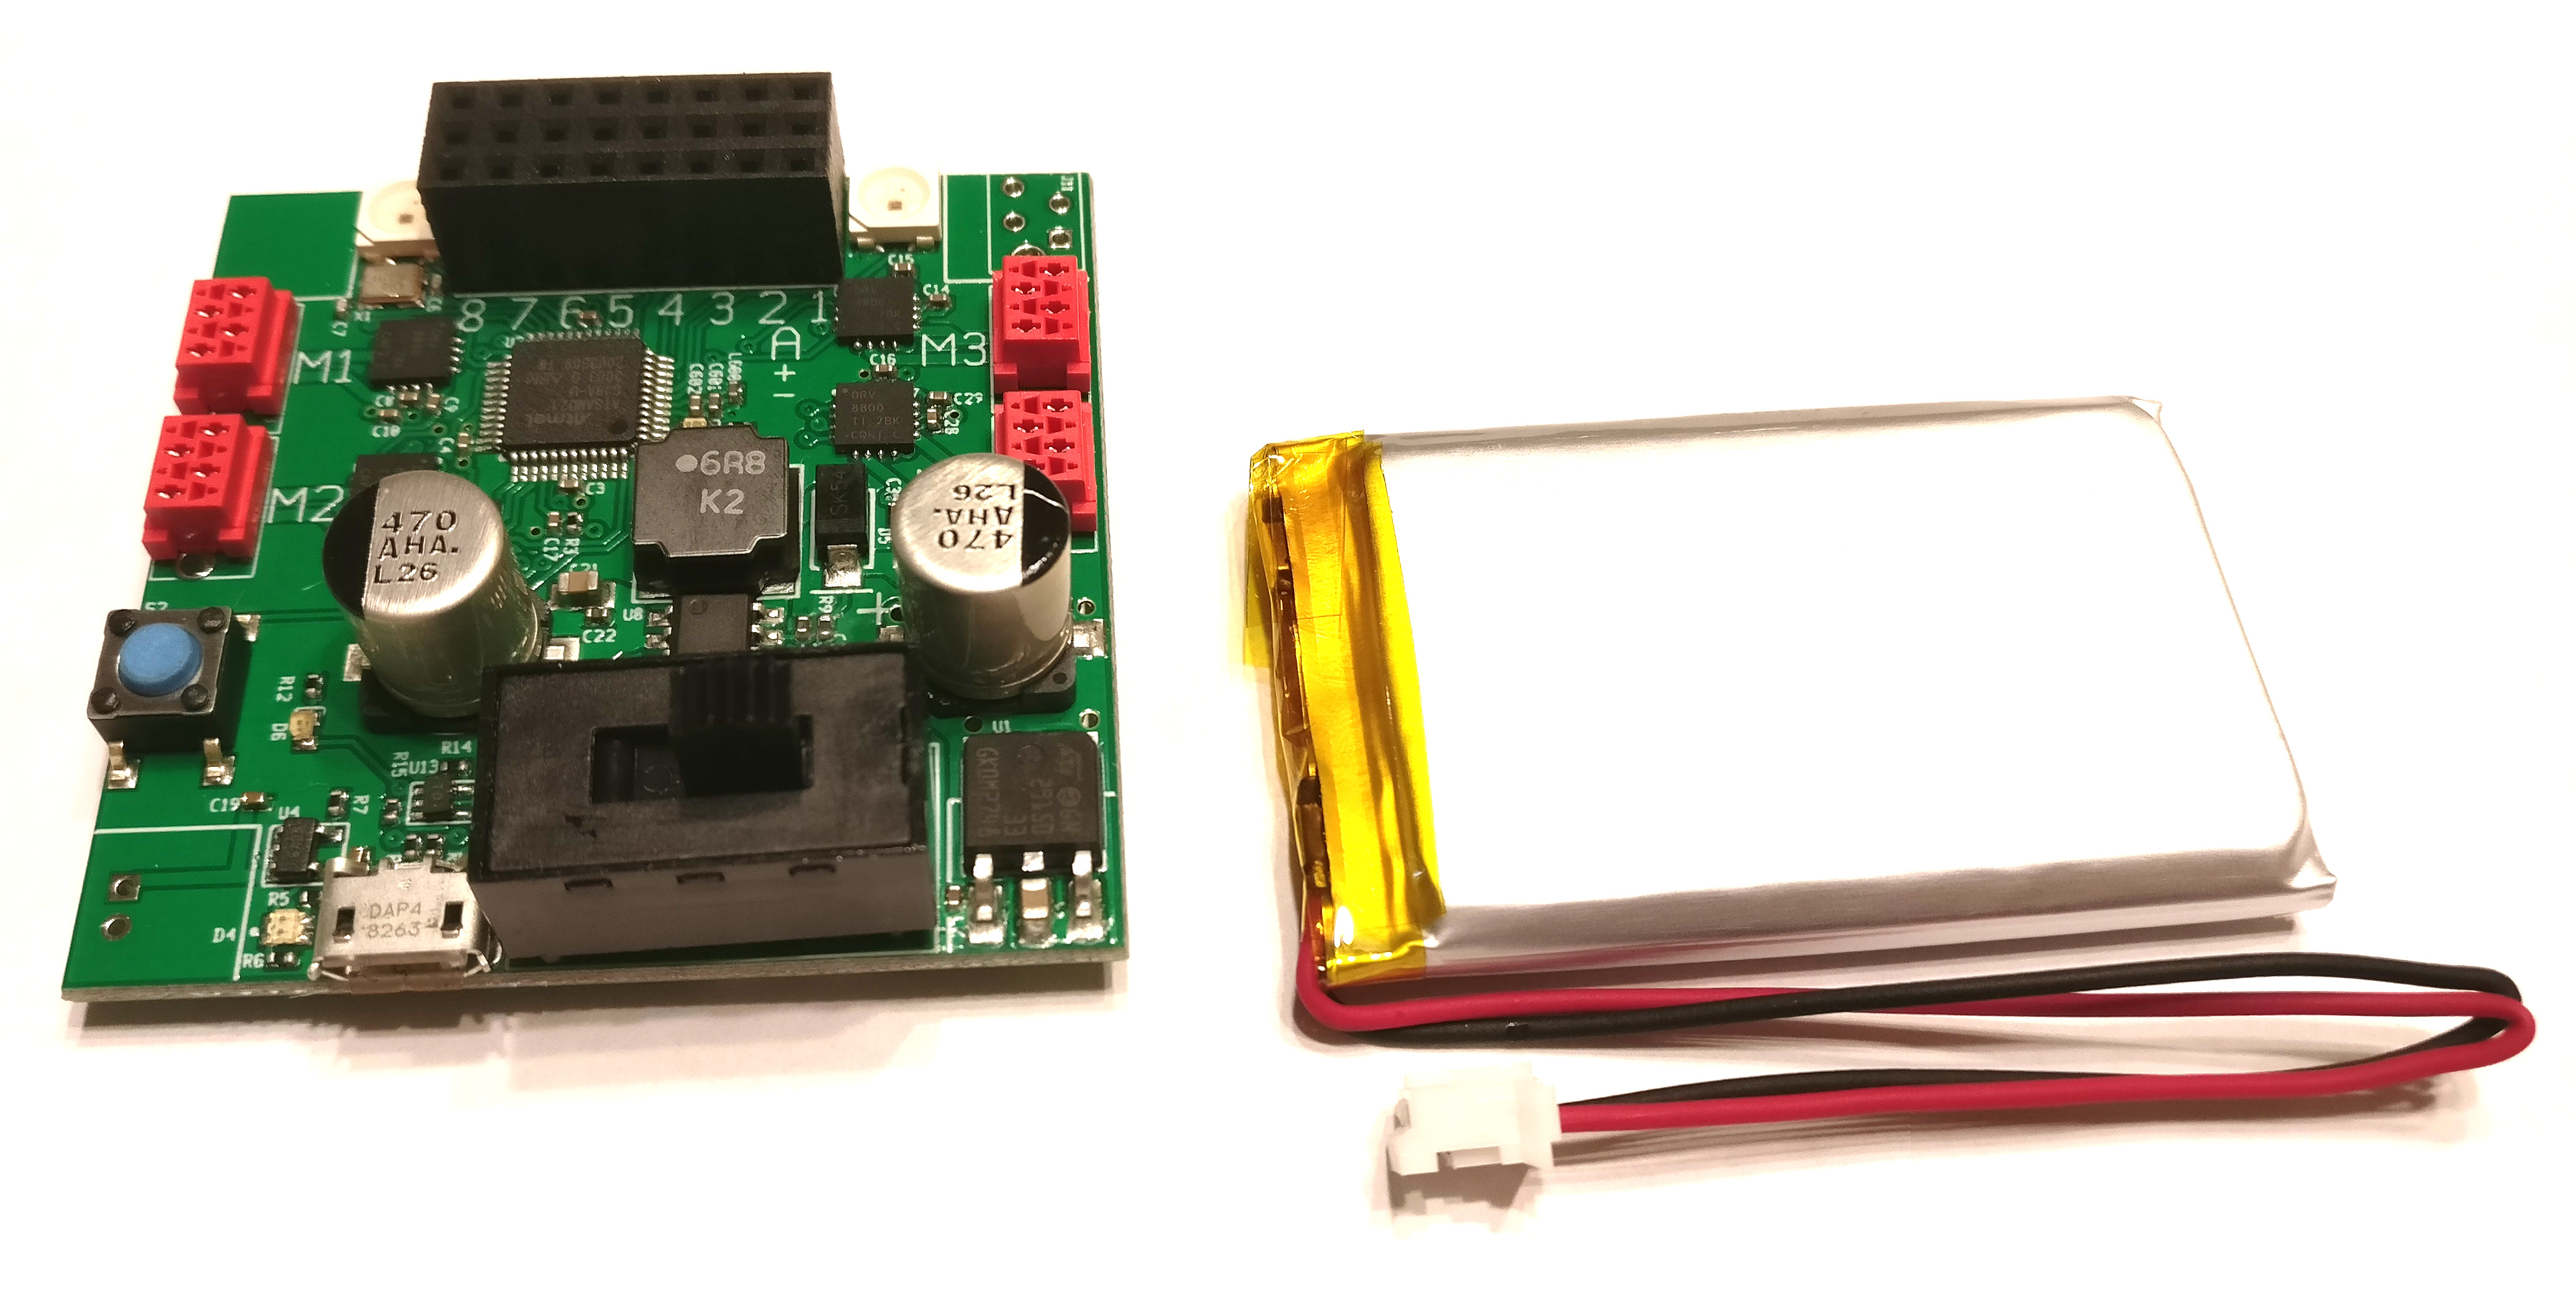
Snekboard is a micro controller board design to execute Python programs to control robots build from LEGO® elements. Here are the primary components:
-
32-bit ARM microcontroller
-
Lithium Polymer battery
-
9V power supply
-
Four 9V motor controllers
-
Eight 3.3V I/O ports
-
Two RGB LEDs
-
USB connector for communication and power
Plug the provided battery into the battery connector found on the bottom of the Snekboard and connect the Snekboard to a source of power over USB to charge the battery. There are two LEDs near the battery connector; the red one is illuminated while the battery is charging, the green one lights when the battery is charged. Both will light up if the battery is missing or broken.
2. Snekboard Accessories
There are two accessory sets available for Snekboard:
-
Snekboard Cable Set. This contains four Motor Cables to hook up LEGO® Power Functions motors and four I/O Cables to connect sensors.
-
Snekboard Sensor Kit. This contains two Reflectance Sensors and two Distance Sensors, along with cables to hook them up to Snekboard.
2.1. Connecting the Battery
Snekboard uses a single cell Lithium Polymer battery which measures about 30x48mm. It’s designed to fit underneath the board inside the enclosure. Here’s the battery sitting near a Snekboard:
Plug the cable into the connector on the bottom of Snekboard.
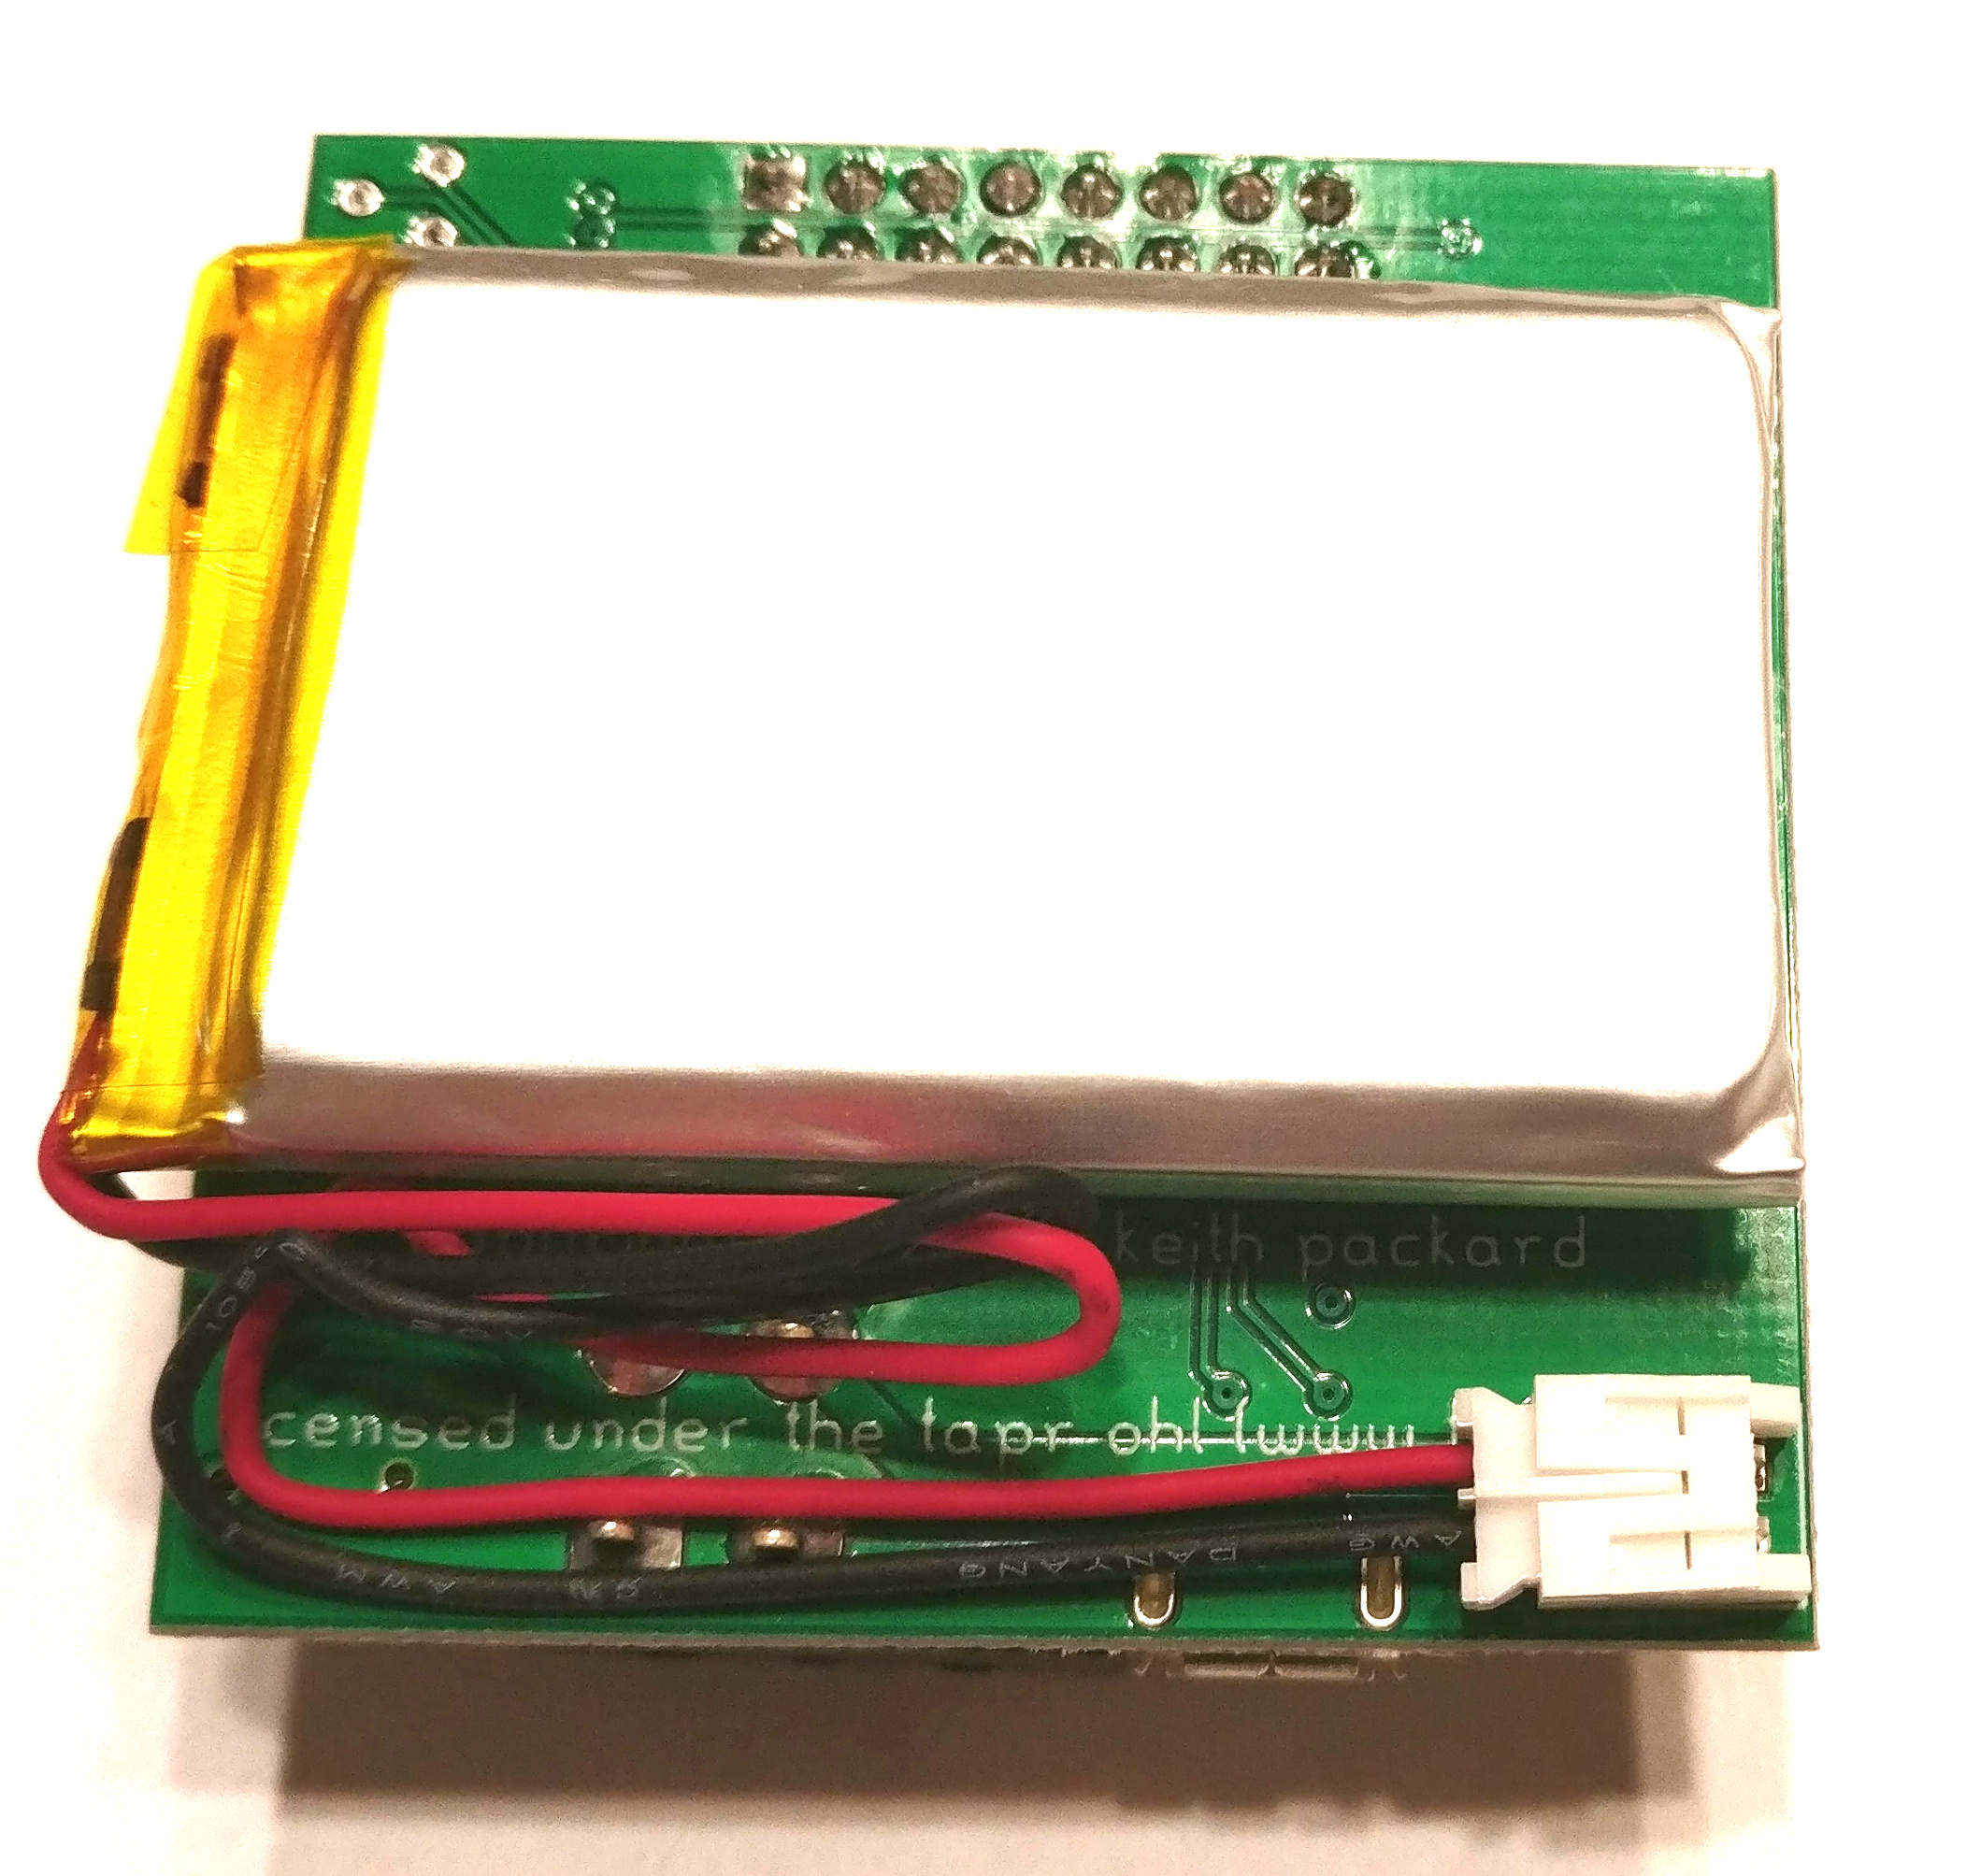
The battery comes partially charged, charge it fully by connecting Snekboard to a source of power for a couple of hours until the Battery LED changes from red to green.
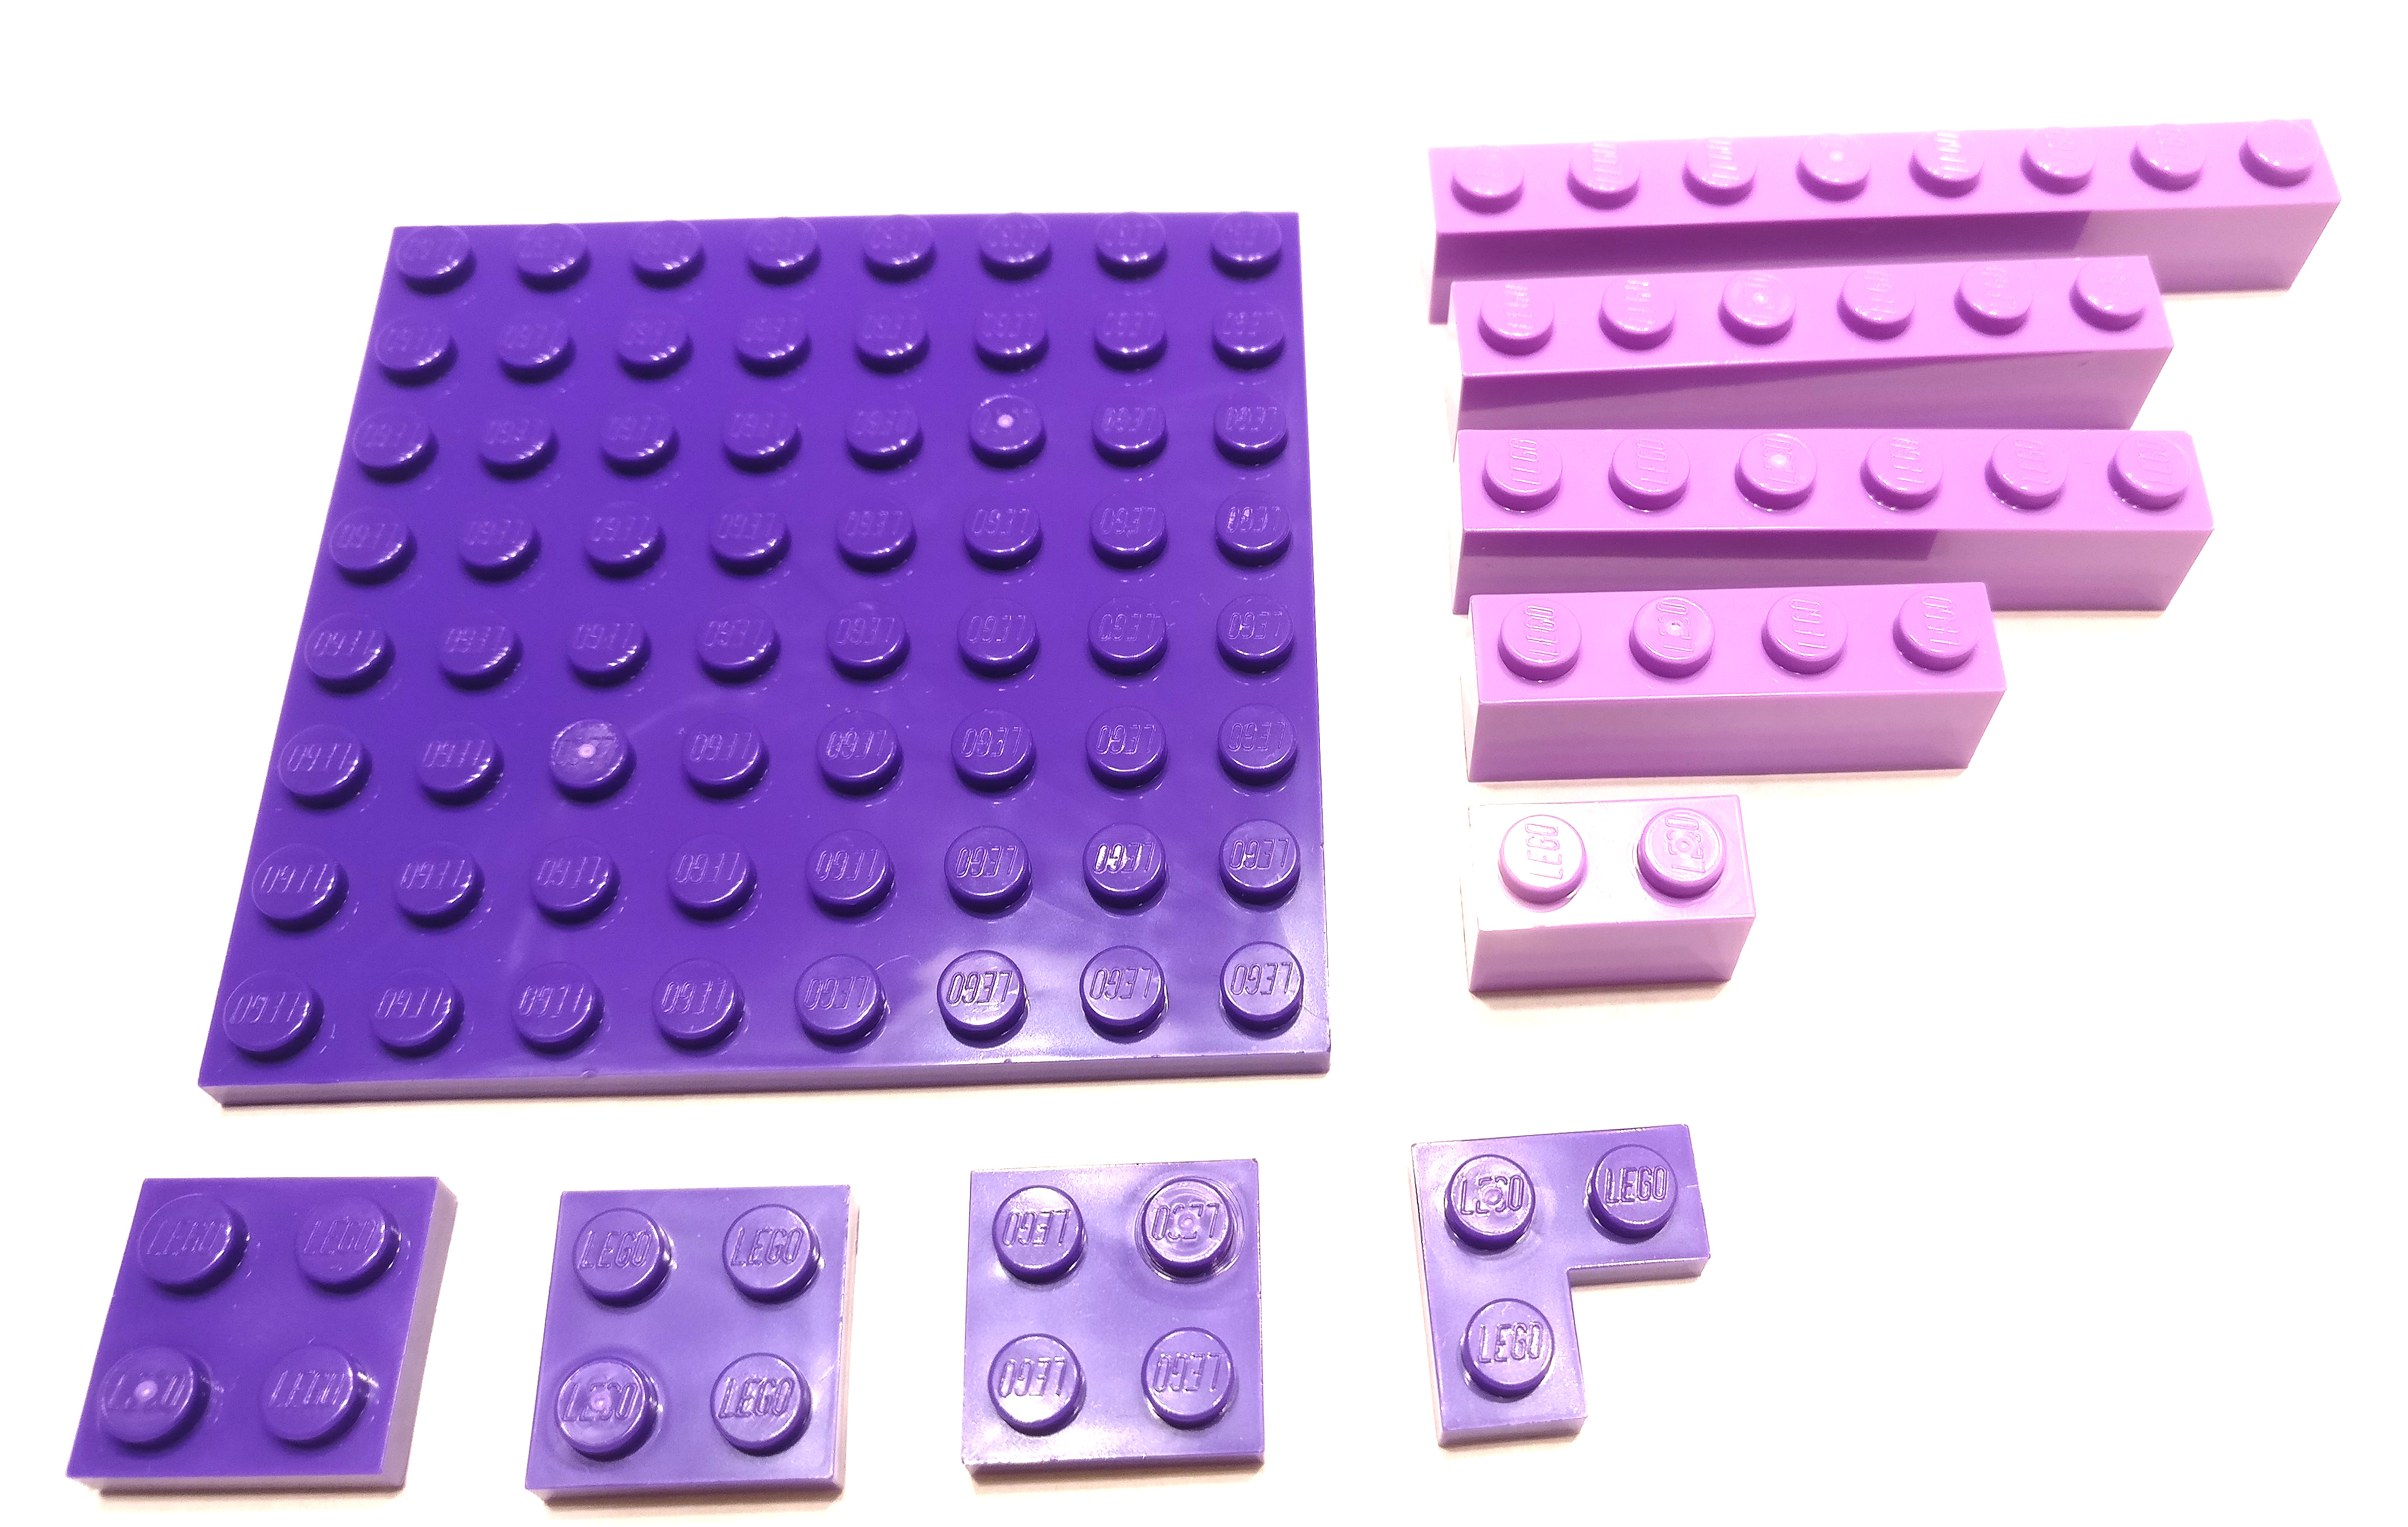
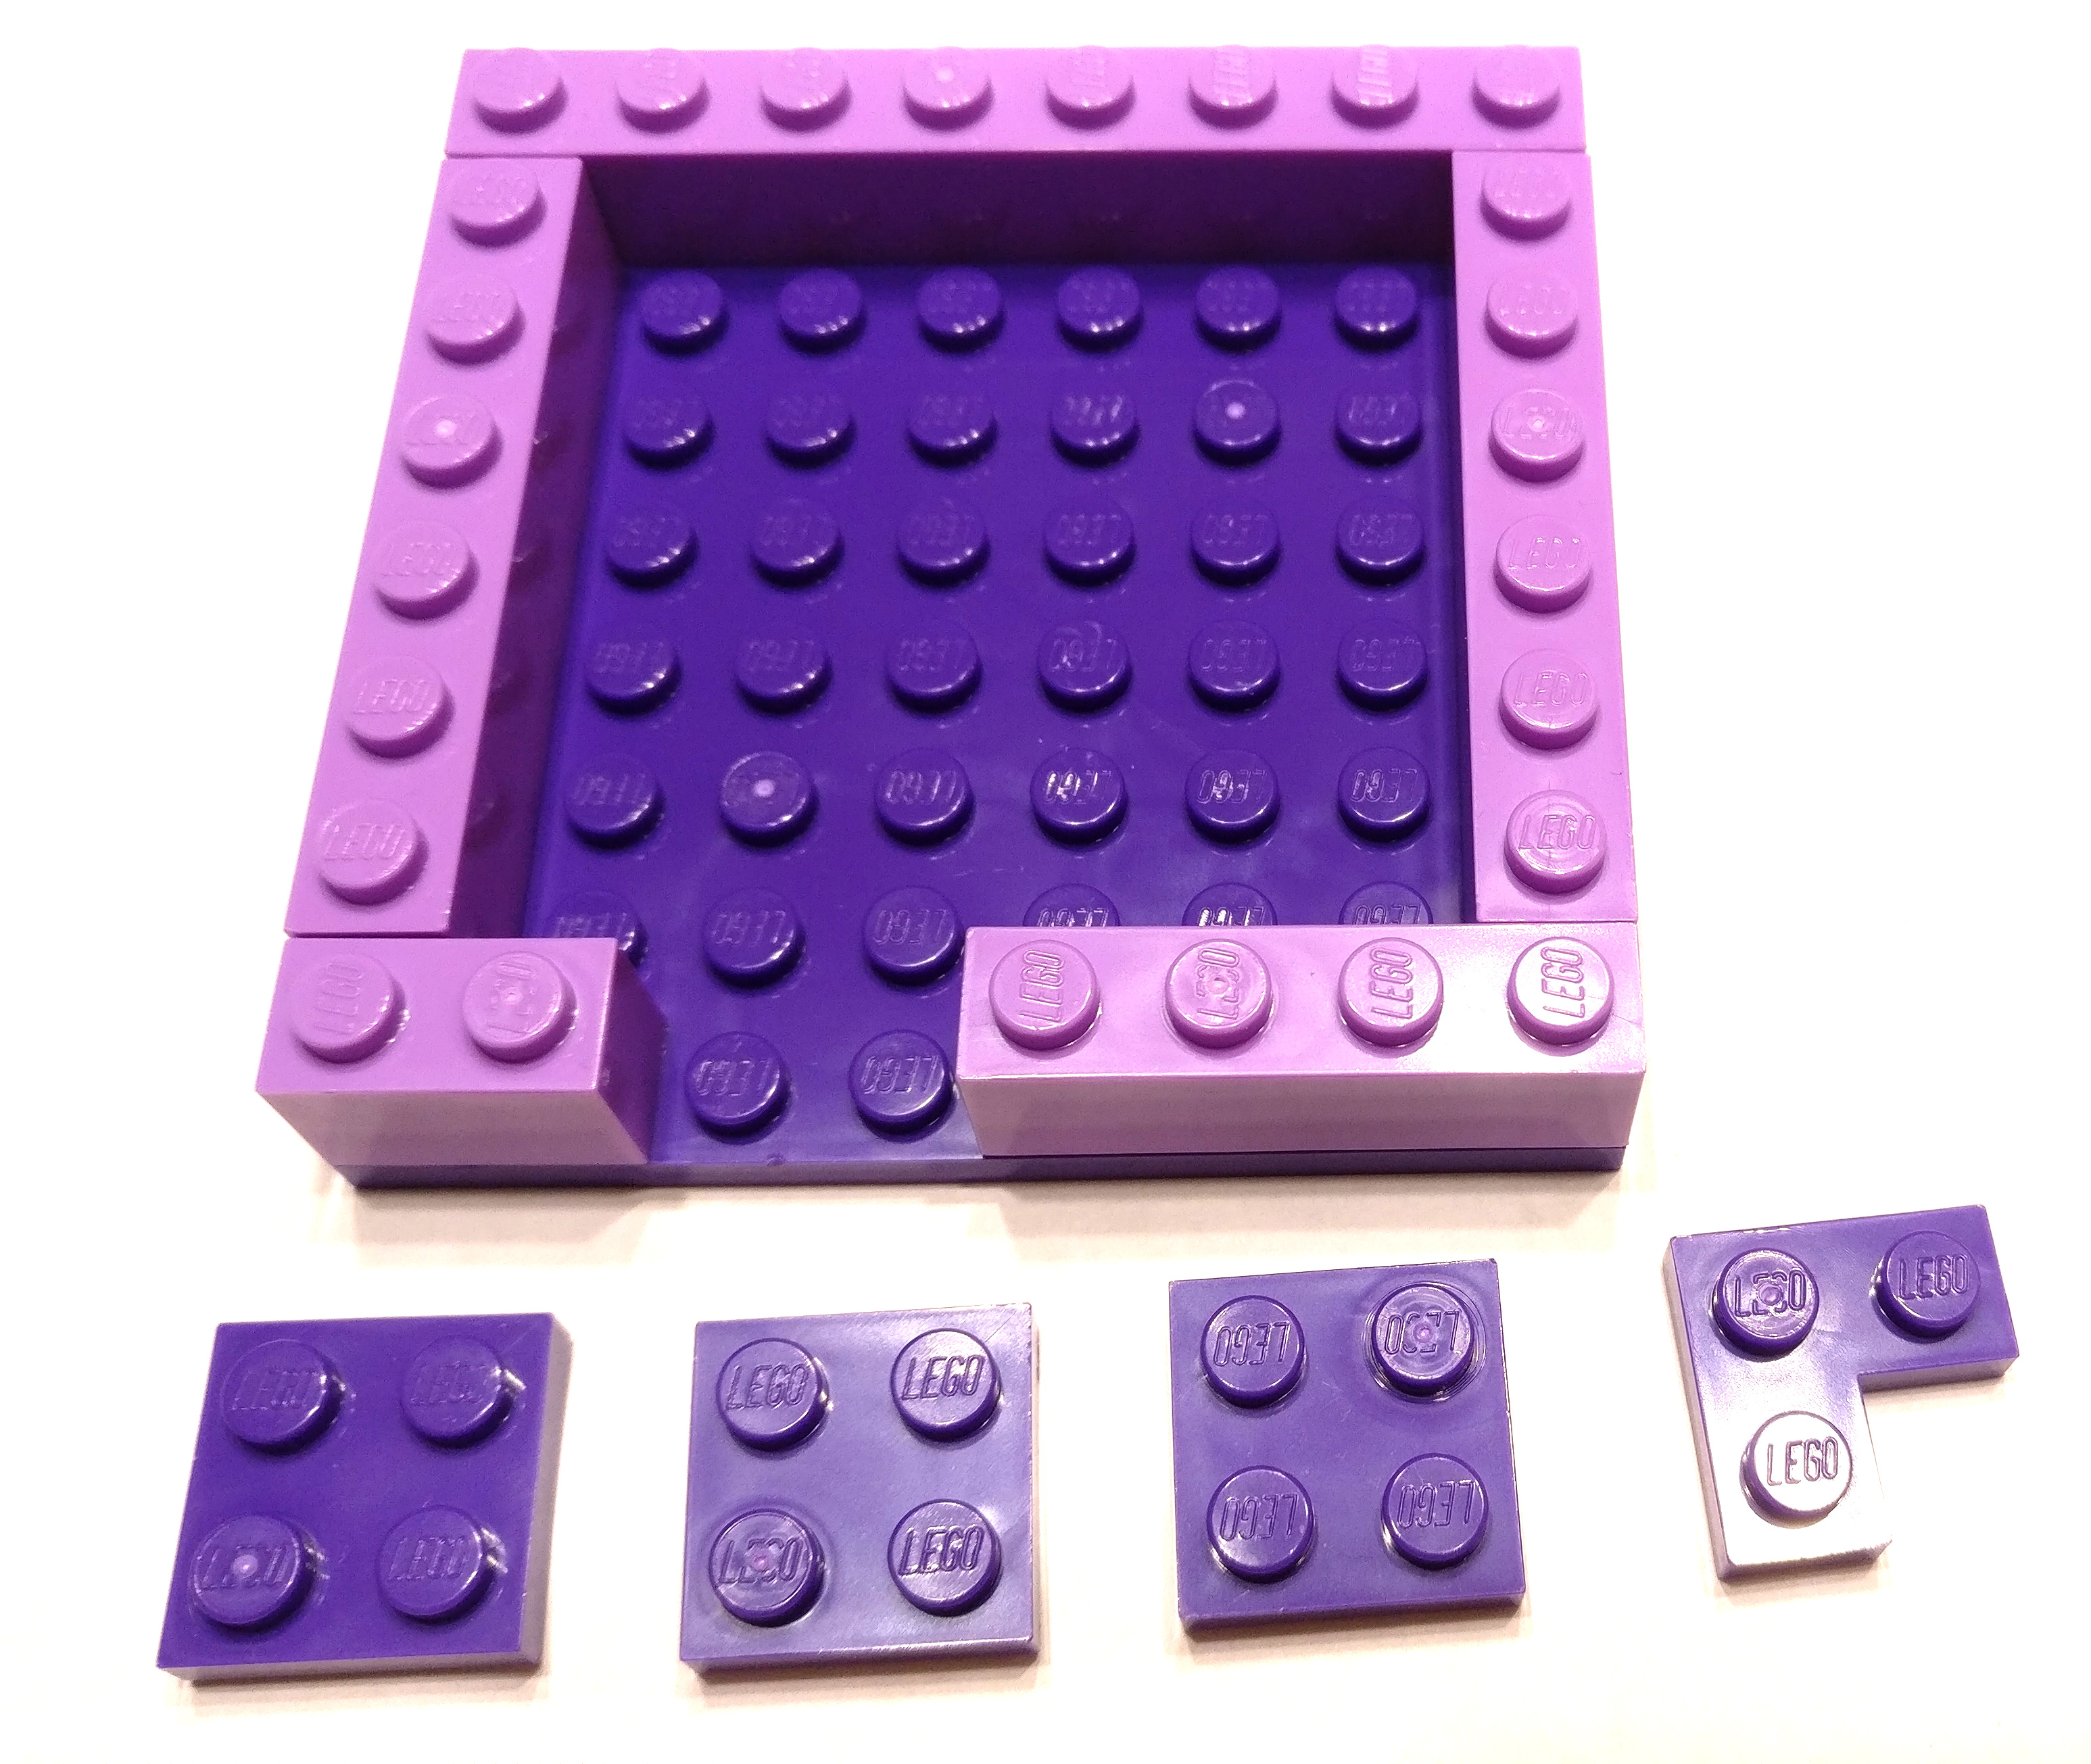
2.2. Building a Snekboard Enclosure
Snekboard is designed to fit neatly into an enclosure made from standard LEGO® elements so that the completed assembly can be securely integrated into a LEGO® model. Here’s the parts necessary to build an enclosure:
Here’s the enclosure assembled, waiting for the Snekboard to be installed:
And here’s how it looks with the Snekboard and battery installed:
2.3. Using the Snekboard Motor Cables
The Snekboard motor cables come pre-assembled and ready for use. Connect the Micro MaTch connector (which may be red or black) to one of the four red Micro MaTch connectors on Snekboard with the cables pointing away from the board. There is a plastic pin on the side of connector which fits into a hole on the Snekboard circuit board.
There are two styles of Snekboard Motor Cables which can be distinguished by color. The light gray cables can connect to either LEGO® Power Functions motors or LEGO® RCX motors. Connect to Power Functions motors using the top of the LEGO® connector and to RCX motors using the bottom of the connector. The dark gray cables can only connect to Power Functions motors, but you can use either the top or bottom of the connector.
You can also use the Motor Cables to connect to LEGO® Power Function Light elements.
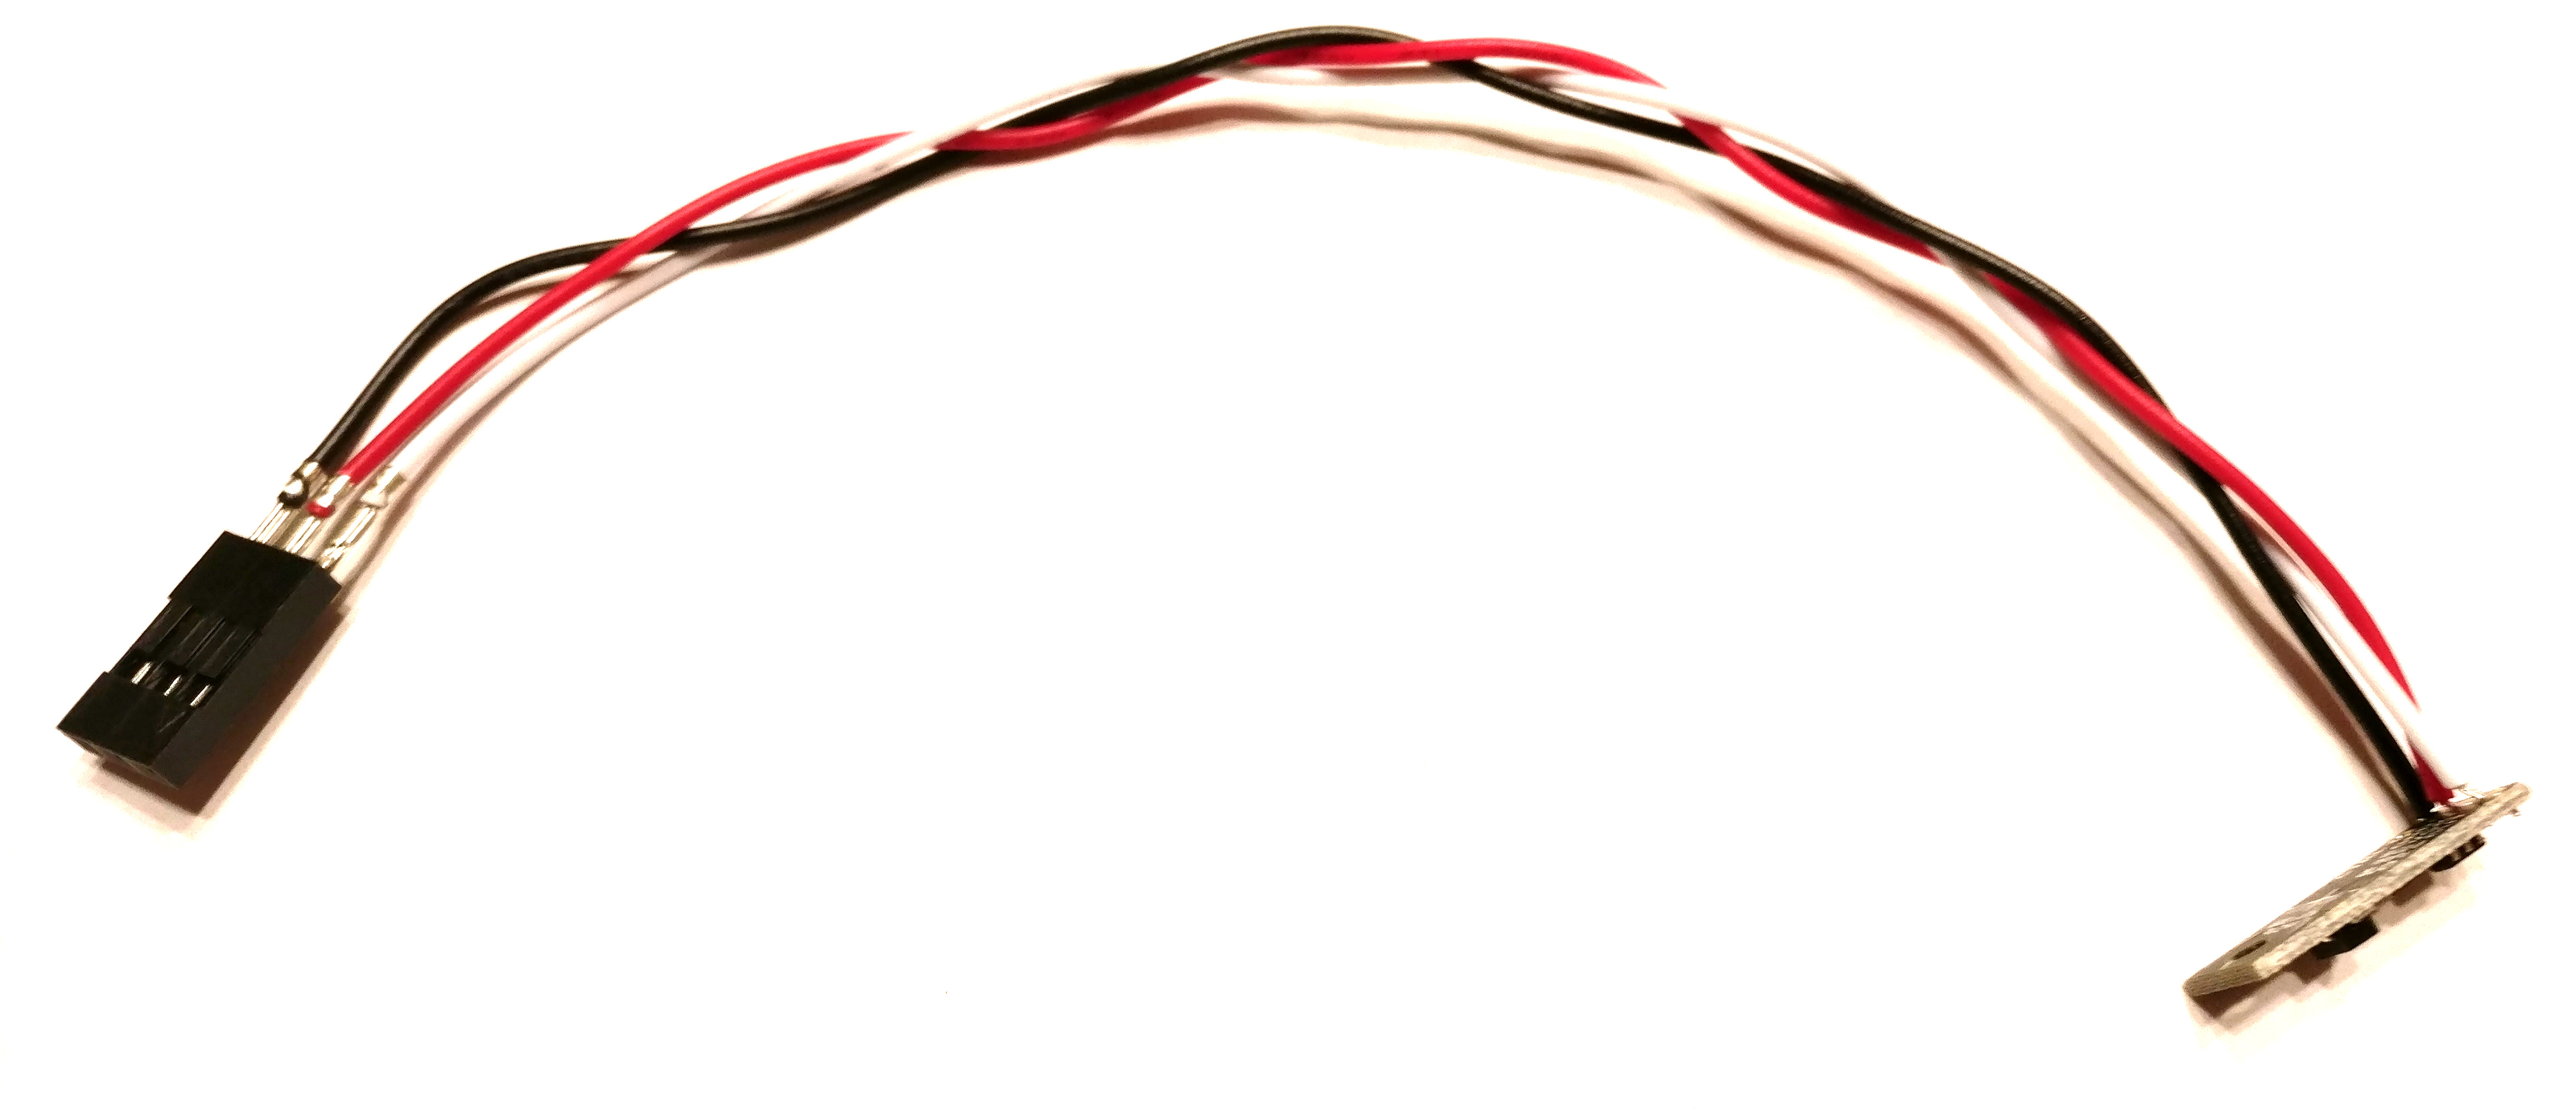
2.4. Preparing the Snekboard I/O Cables
The I/O cables come as a kit — four sets of three wires with attached pins and four connector housings. Insert the pins into the connector housing, black on one side, white on the other with red in the middle.
At this point, they’re ready for whatever you want to use them for:
-
Black is ground
-
Red is +3.3V
-
White is signal
Plug the I/O cables into any one of the eight I/O ports on Snekboard, making sure to orient the connector so that the white wire is closest to the edge of the Snekboard and the black wire is furthest.

2.5. Assembling the Snekboard Sensors
The Reflectance Sensors have an integrated IR transmitter and receiver unit mounted on a tiny circuit board. Three wires have been soldered to the board:
-
Black is ground
-
Red is +3.3V
-
White is signal

Prepare these by braiding the wires together and then inserting them into the provided connector housing, black and white on the sides and red in the middle.
The Distance Sensors come with pre-assembled cables that have a JST connector on one end that plugs into the Distance Sensor and three pins on the other end. Prepare these by braiding the wires together and then inserting them into the provided connector housing, black and white on the sides and red in the middle.
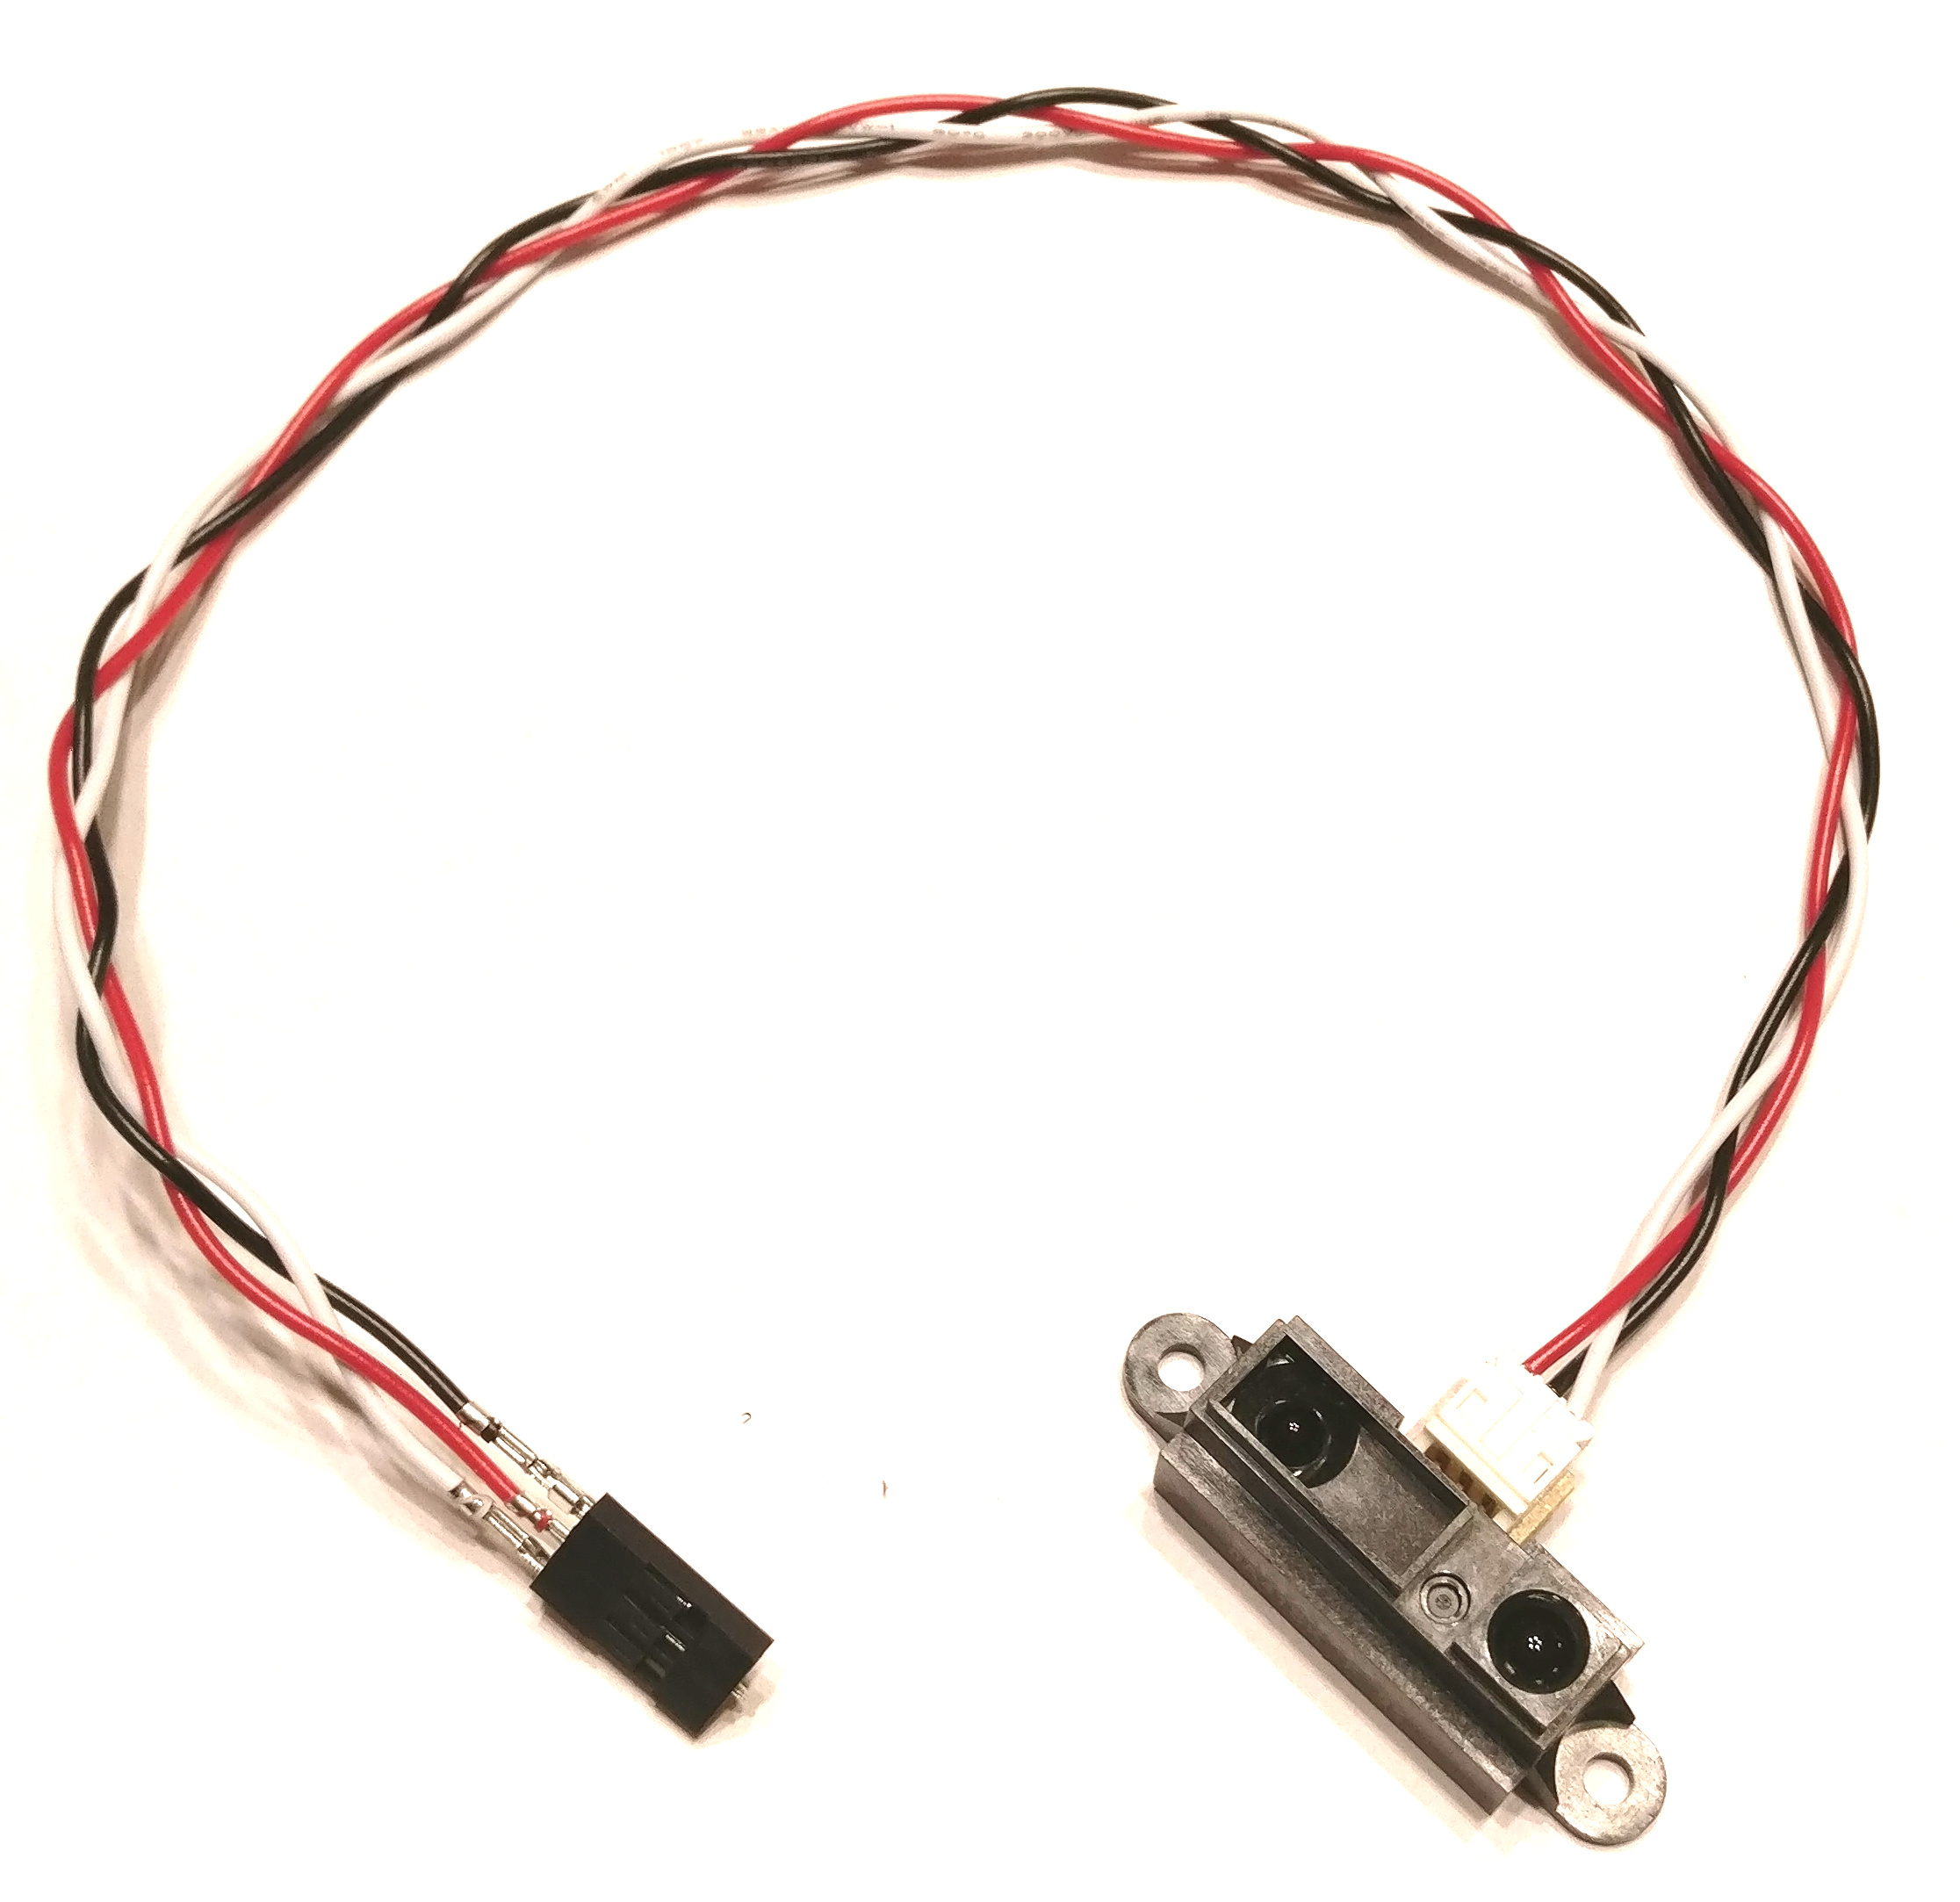
Plug the cables into any one of the eight I/O ports on Snekboard, making sure to orient the connector so that the white wire is closest to the edge of the Snekboard and the black wire is furthest.
One good way to attach the sensors to a robot is to affix them to a LEGO® element using hot glue. This will change the surface of the element, so plan on this being permanent.
For the Distance Sensor, a 1 × 4 Tile (2431) works quite well. Center the sensor on the tile with the connector on the opposite side.
For the Reflectance Sensor, attach it to the short side of a 2 × 4 Brick (3001) with one short side of the sensor near the studs and the wires along the long side of the brick. Bracket 2 × 2 - 2 × 2 with 2 Holes (3956) makes it easy to mount the sensor on the side of a model so that it can face downwards.
3. Software For Snekboard
Snekboard comes pre-loaded with snek, a tiny version of Python designed for begining programmers. Snekboard also supports Circuit Python, a much larger language that offers a more sophisticated environment.
For both languages, you can use the Mu editor, which is a simple Python editor for beginner programmers. The current Mu release supports Snek. You can download those bits from the Code with Mu website: